Access WhatsApp Business Configuration
Connect Your WhatsApp Business Account to Meta Business Through WowChat
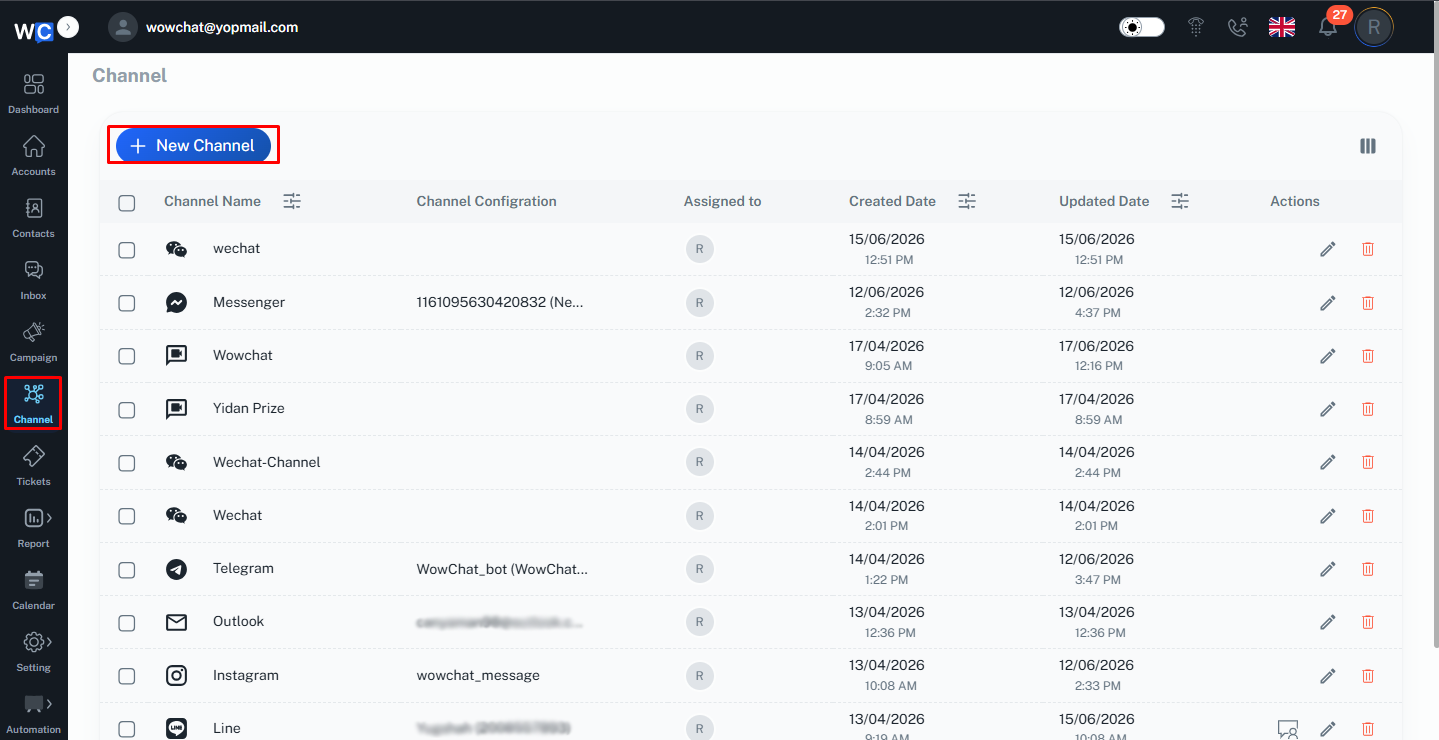
Log in to WowChat using an account that has access to configuration settings.
Open the Channel module from the navigation menu and click the New Channel button.
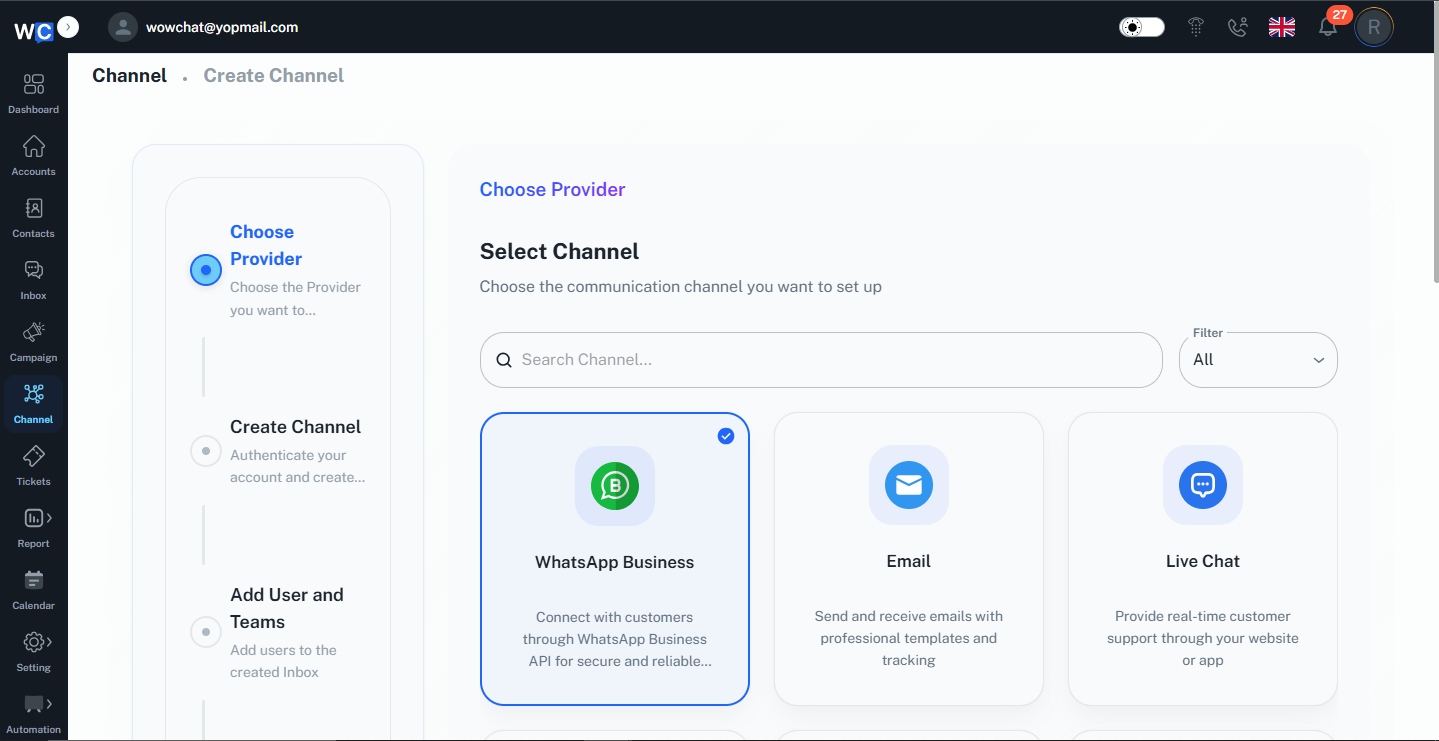
The screen will display a list of available channels. Select the WhatsApp Business channel to proceed with the setup.
Add a WhatsApp Business Account
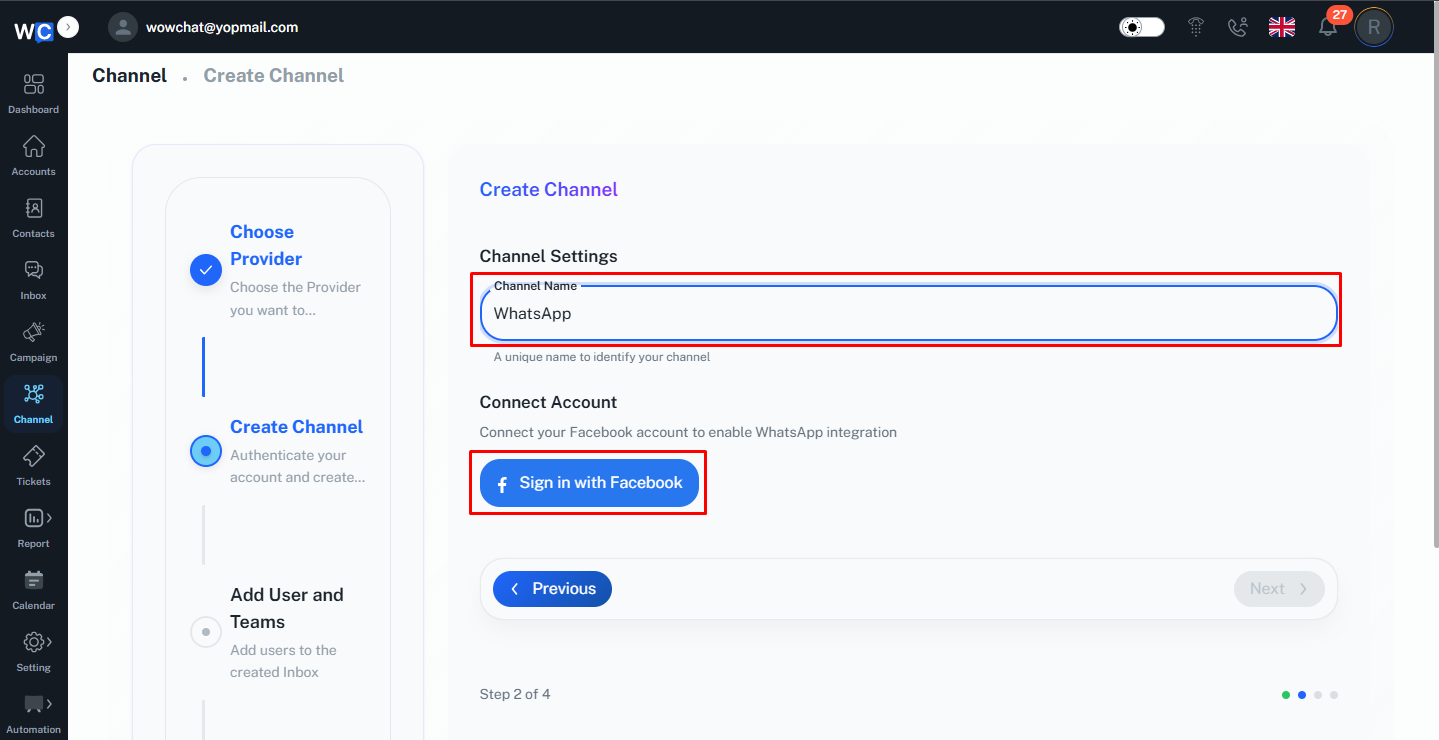
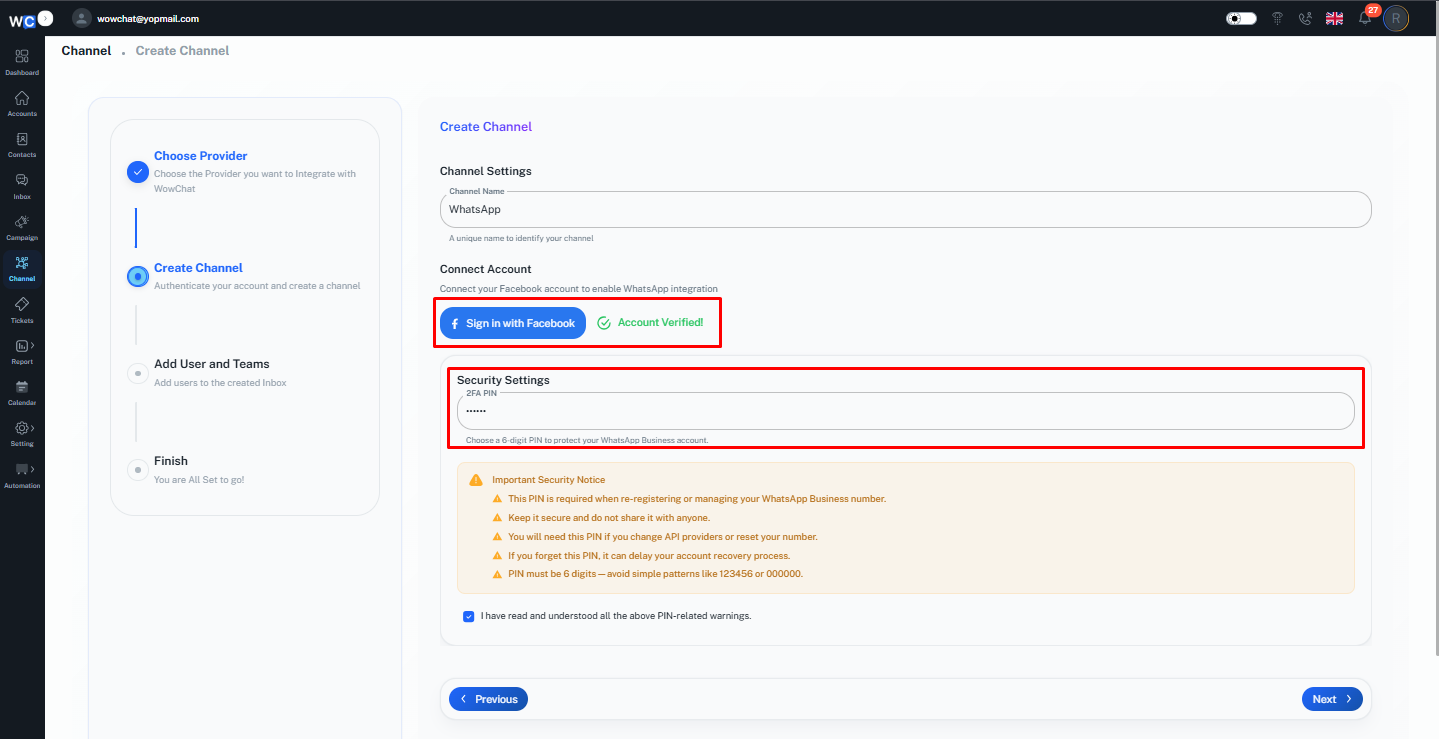
After selecting the channel, you will be redirected to the setup page. Enter a Channel Name, then click Sign in with Facebook to continue connecting your WhatsApp Business account.
Log in to your Facebook account to continue with the connection process and authorize access to your WhatsApp Business account.

After logging in, Meta may ask for a verification code from the authenticator application that is configured for Two-Factor Authentication (2FA) on your Facebook account. Enter the authentication code to verify your identity and continue with the setup process.

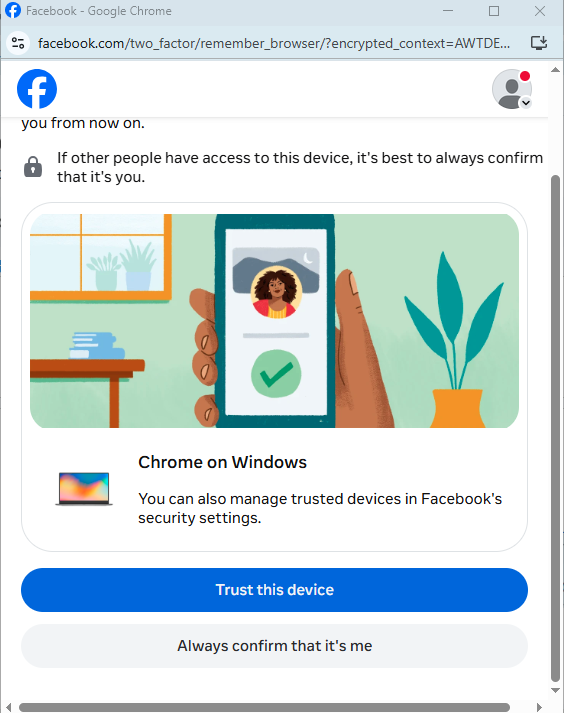
Click Trust This Device to confirm the device and continue with the authentication process. This helps reduce the need for additional verification on future logins from the same device.
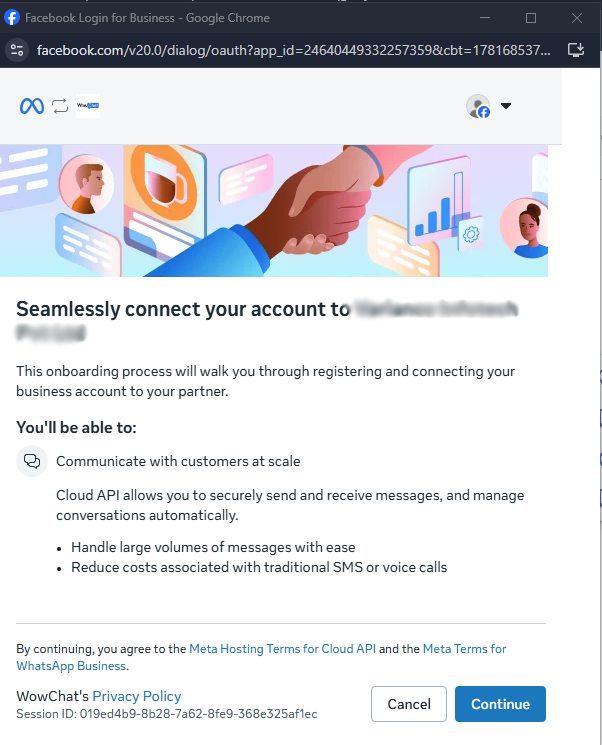
Meta will display an onboarding screen explaining the benefits of connecting your WhatsApp Business account through the Cloud API. Review the information and click Continue to proceed with the account setup and authorization process.
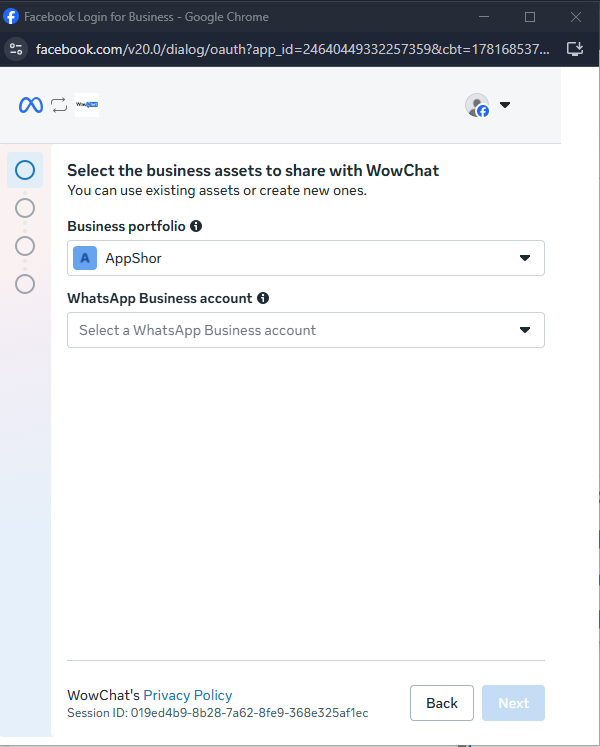
Select the business assets that you want to share with WowChat. Then choose the WhatsApp Business Account you wish to connect to or select Connect WhatsApp Business App to link the account and continue with the setup process.
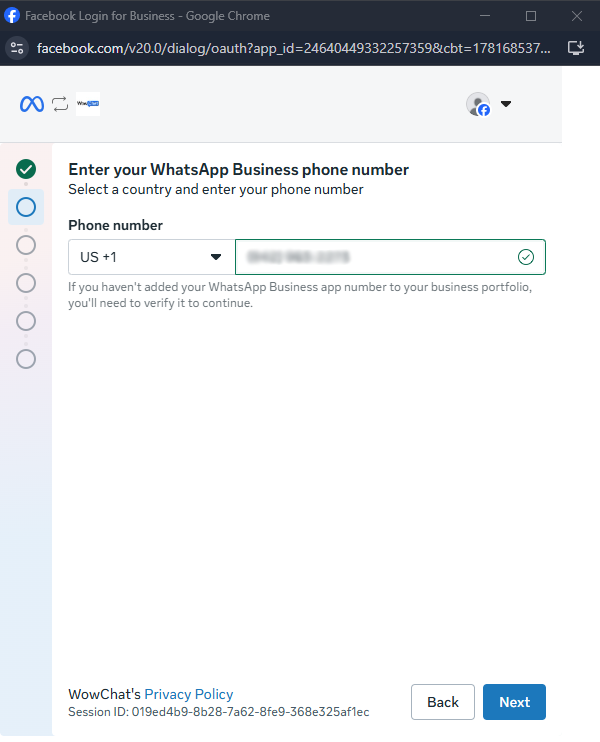
On the next page, enter your WhatsApp Business phone number and select the appropriate country code. Once the details are entered, click Next to continue with the verification and setup process.
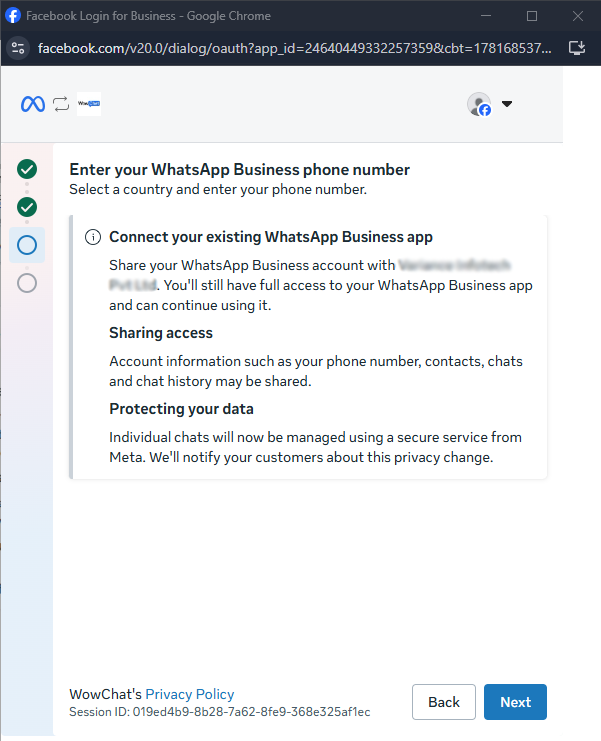
On the next page, Meta will display information about connecting your existing WhatsApp Business App, sharing access, and protecting your data. Review the details and click Next to proceed with the connection process.
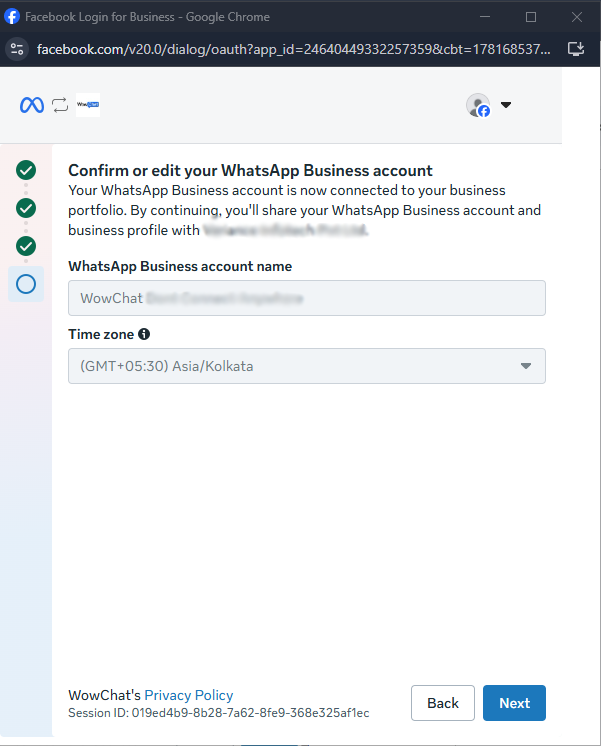
Review the selected Business Account details and verify that the correct time zone is displayed. Once confirmed, click Next to continue with the WhatsApp Business account setup.
Review the information that will be shared with WhatsApp Business and the permissions that WowChat is requesting for your WhatsApp Business Account. Once you have reviewed the access details, click confirm to grant the required permissions and continue with the setup process.

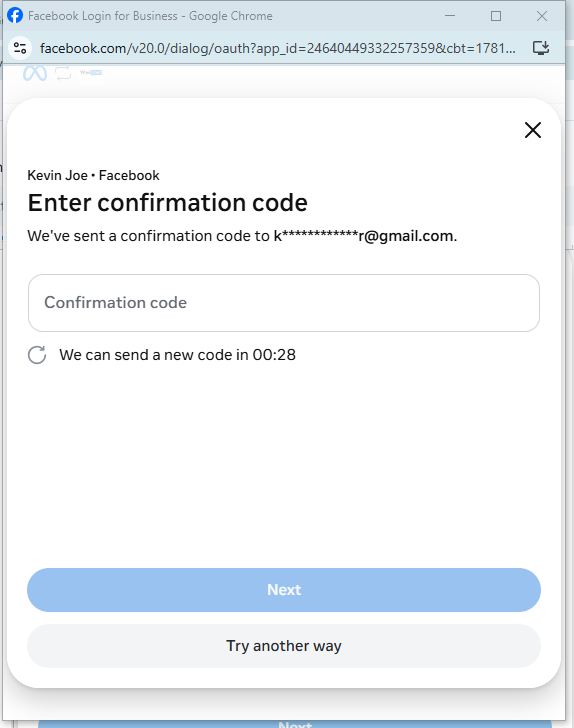
In the final step, Meta will send a verification code to the method you select, such as your mobile phone, email address, or another available option. Enter the verification code and click Next to complete the authentication and finish connecting your WhatsApp Business account.
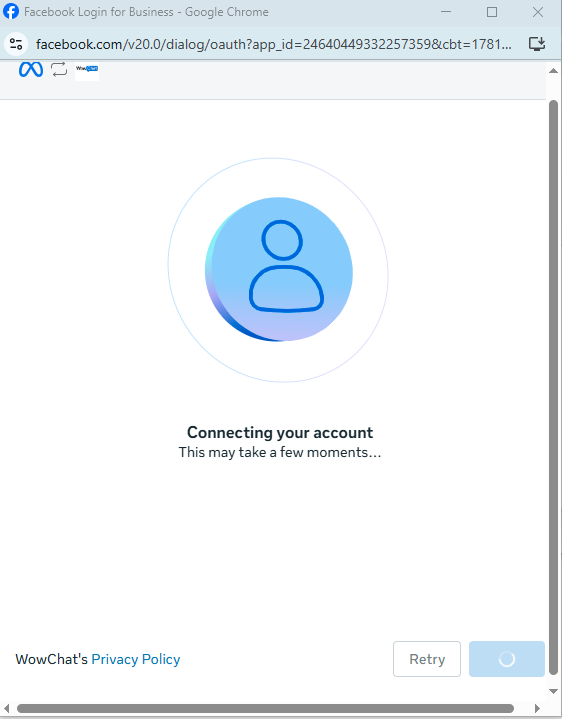
A Connecting window will appear, showing the progress of the connection process between Meta, WhatsApp Business, and WowChat. Please wait while the setup is completed and the required account information is synchronised.
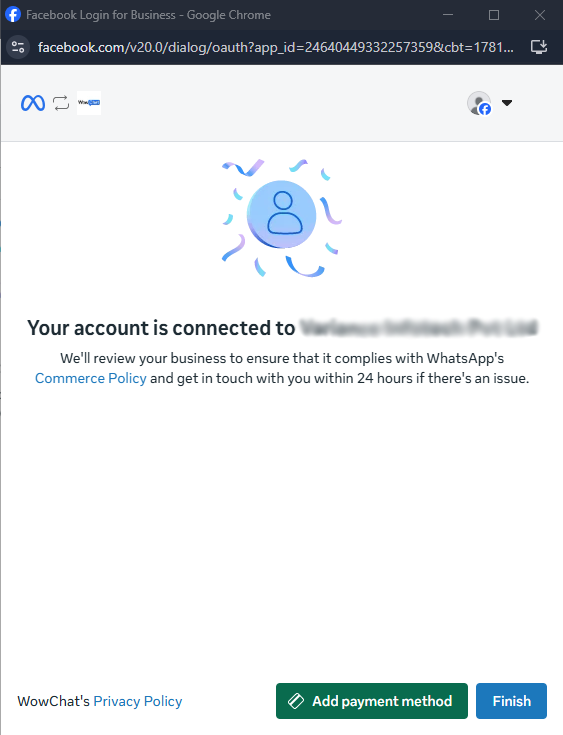
Once the connection process is complete, a confirmation screen will appear indicating that your WhatsApp Business account has been connected successfully. Click Finish to close the setup wizard and return to WowChat, where you can verify that the WhatsApp Business channel has been connected successfully.
Back in WowChat, you will be prompted to enter the 2FA (Two-Factor Authentication) PIN associated with your WhatsApp Business account. Enter the PIN and click Save to complete the setup process. Once saved successfully, your WhatsApp Business account will be fully connected and ready to use in WowChat. Enjoy managing your WhatsApp Business conversations directly from WowChat.
FAQ
WhatsApp Business integration allows you to connect your WhatsApp Business Account with WowChat so you can manage all customer conversations, messages, and interactions from a single platform.