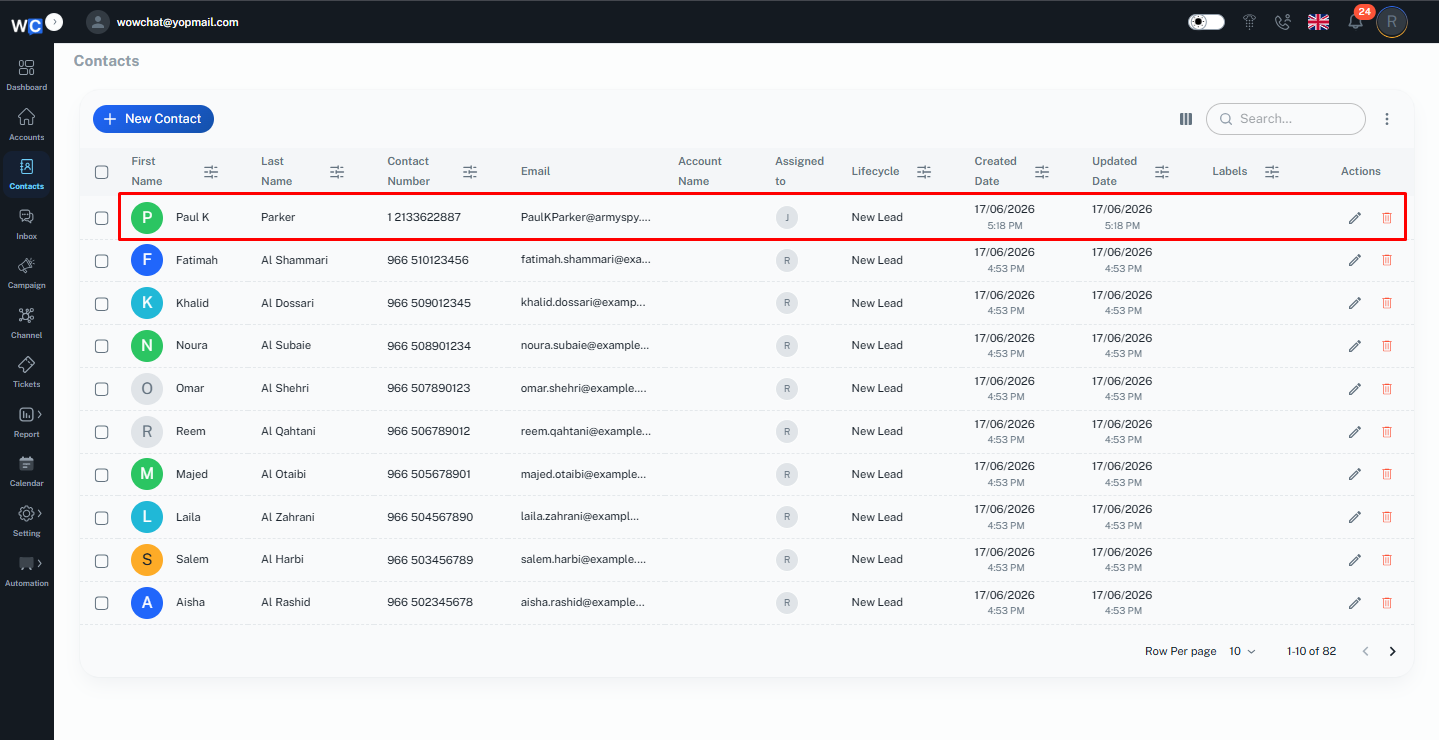
Listing Page Quick Actions
The Contact Listing Page in WowChat provides quick actions that help users efficiently manage contact records directly from the list view. These actions are designed to improve usability, speed up workflows, and reduce the need to open individual records for basic operations.
Available Quick Actions
On the Contact Listing Page, users can access the following quick actions:
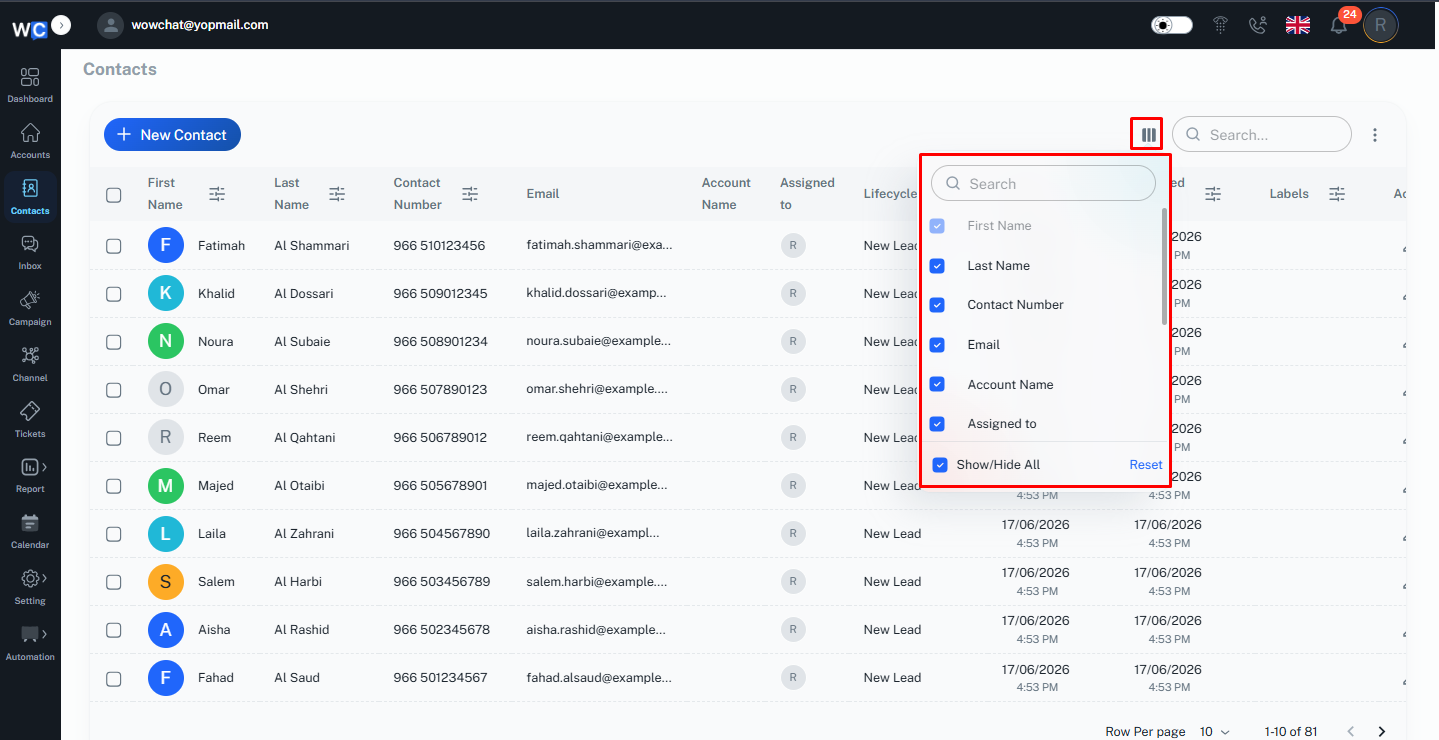
Column Management
Users can customize the visible columns in the listing page to display only the required contact information for better readability and control.
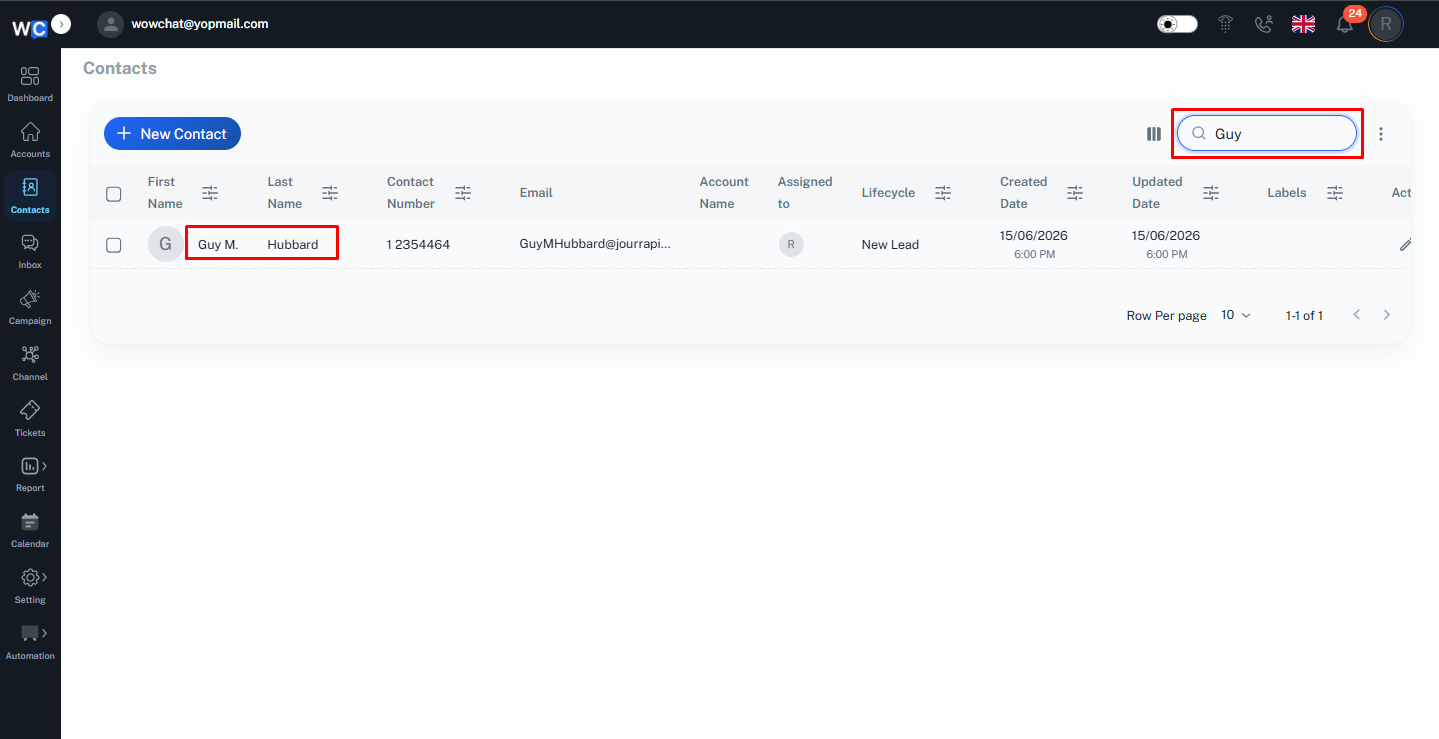
Search Records
A search option is available to quickly find specific contacts using keywords such as name, email, or phone number.
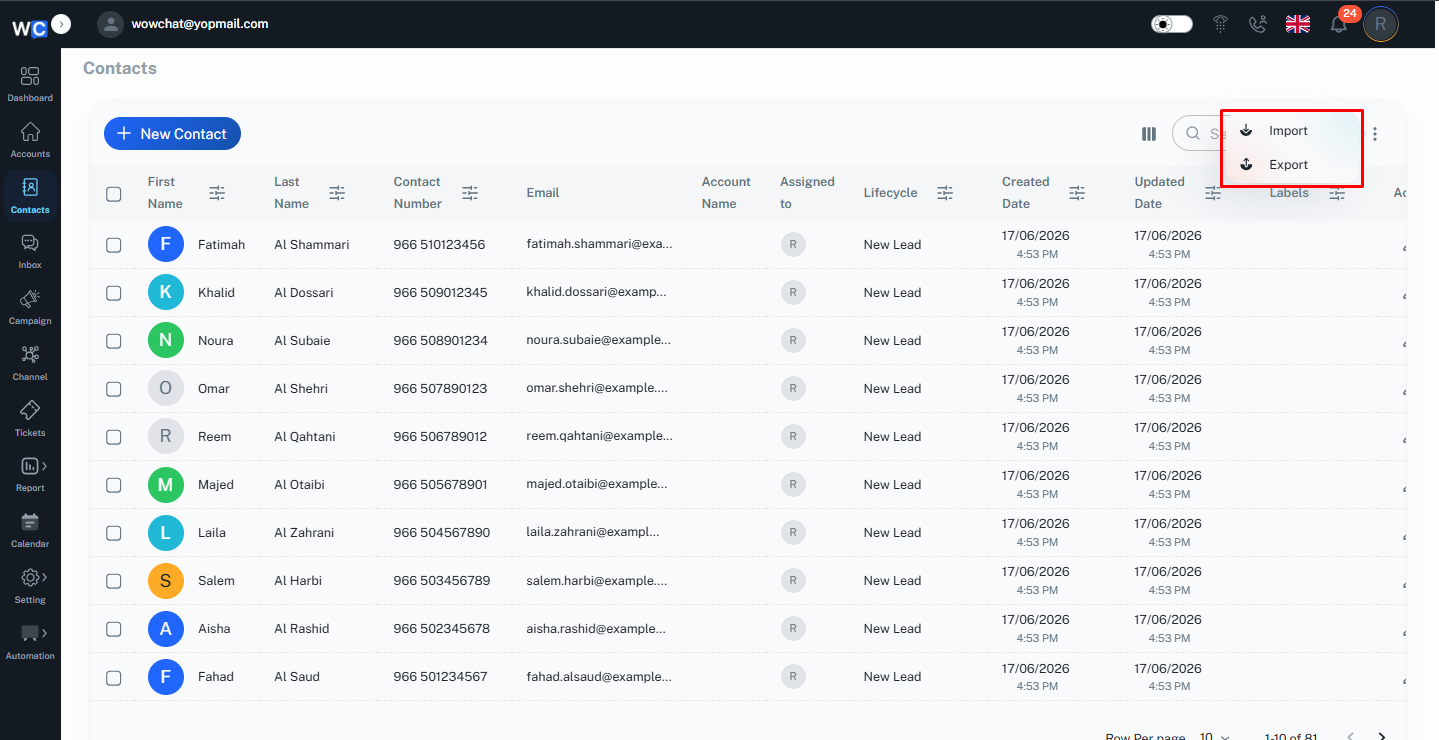
More Options (Three Dots Menu)
The three-dot menu provides additional functionalities, including:
- Import contacts
- Export contacts
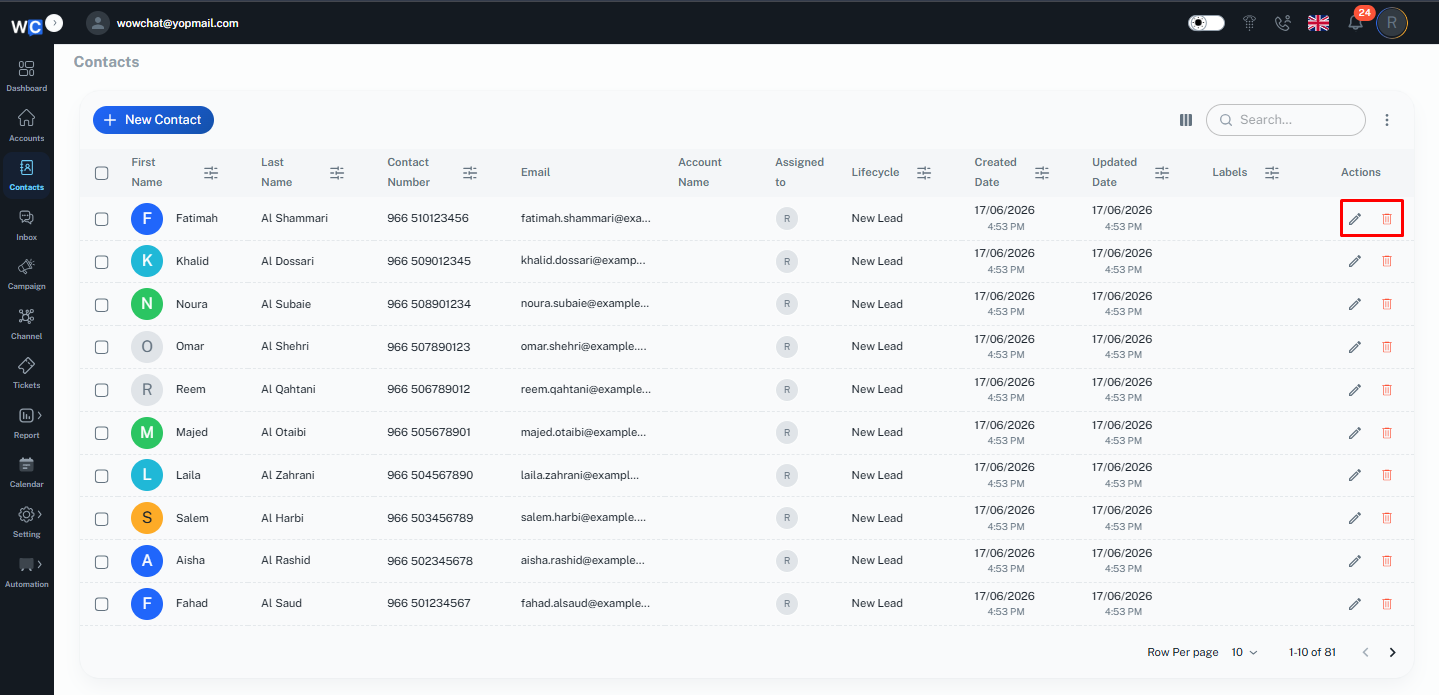
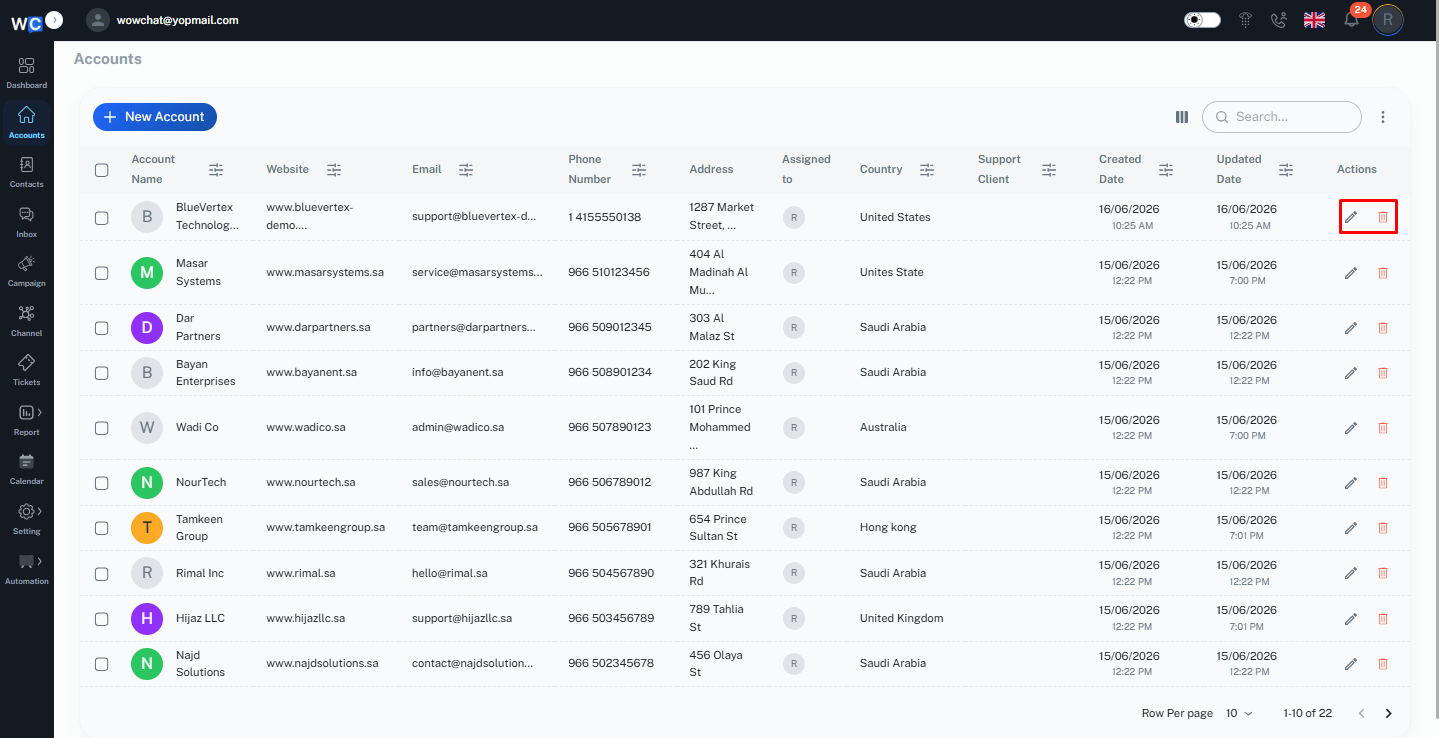
Edit Icon
Allows users to quickly update contact details without navigating to the Contact Details Page.
Delete Icon
Enables users to remove unwanted or duplicate contact records from the system.
These quick actions help users manage contact data more efficiently and perform common tasks directly from the listing page.
To create a new contact, go to the Contact module from the WowChat navigation menu and click on the New Contact button.A contact creation form will open where you can enter the customer details and save the record.
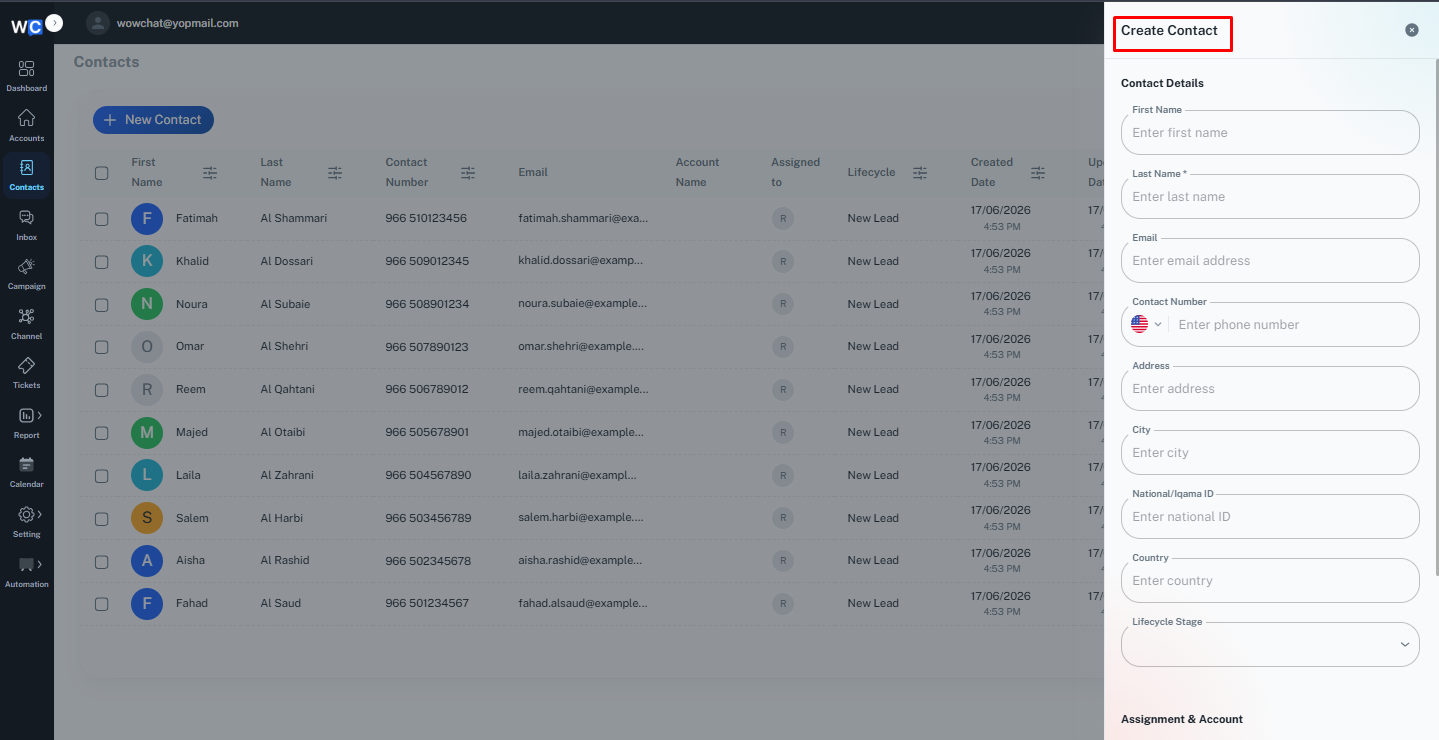
Fill in the required contact details to create a new contact record.Enter the necessary information such as contact name, email address, phone number, account details, and other available fields.
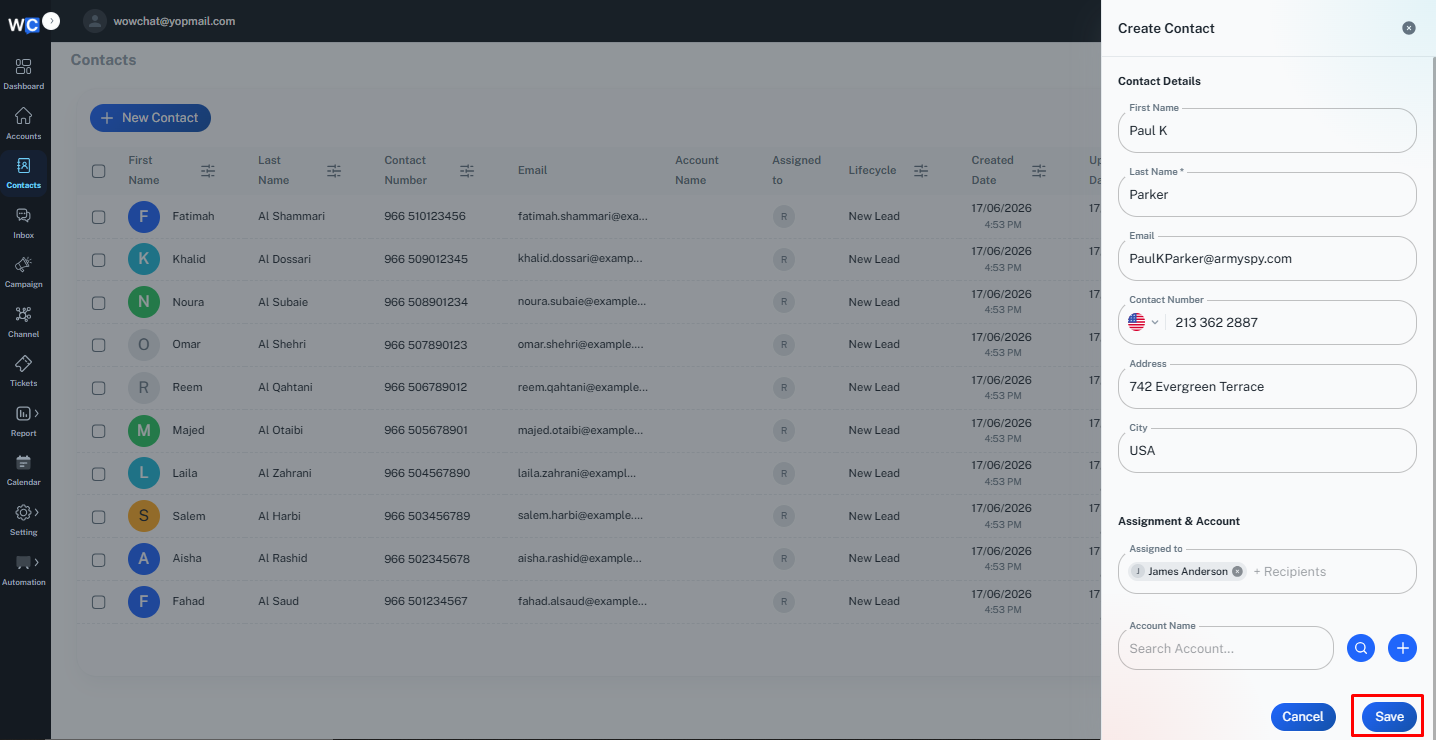
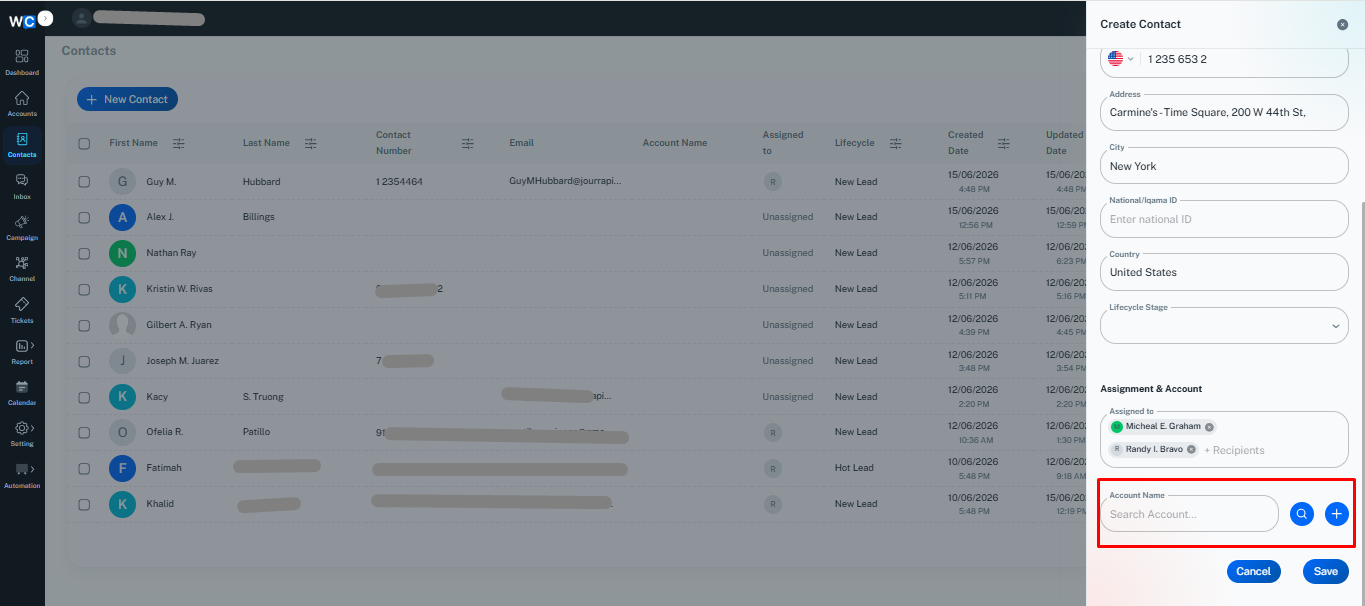
Account Relationship
While creating a new contact, users can associate the contact with a relevant Account.Select the required account from the Account field while filling in the contact details. This creates a relationship between the contact and the selected account, helping users organize customer information and manage related records efficiently.
Once the contact is saved, the linked account details will be available within the contact record.
Once the contact details are saved successfully, the newly created contact record will appear in the Contact Listing Page.Users can view, manage, and update the contact details from the listing page whenever required.
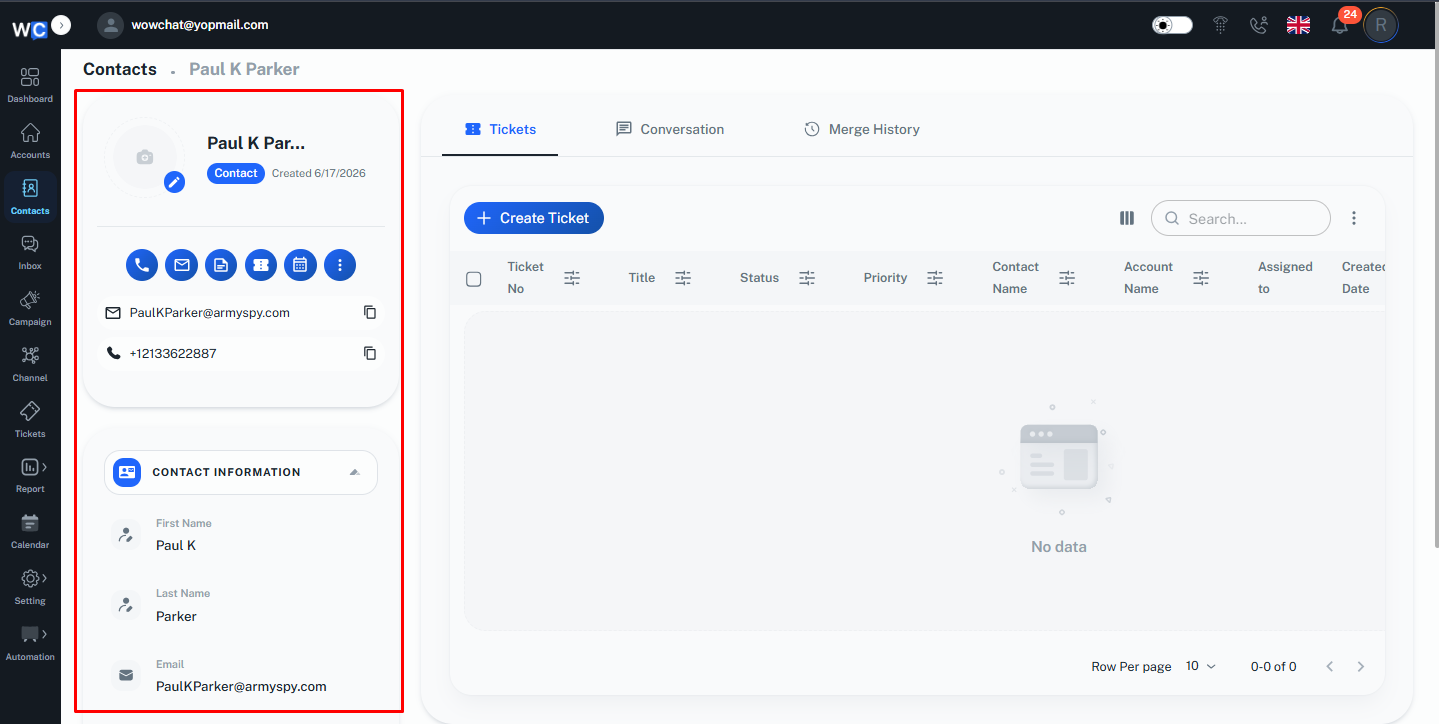
Contact Details Page
The Contact Details page in WowChat provides a complete view of a selected contact record along with related information, conversations, and activities.Users can access customer details, manage contact information, view communication history, and perform actions related to the selected contact from a single page.
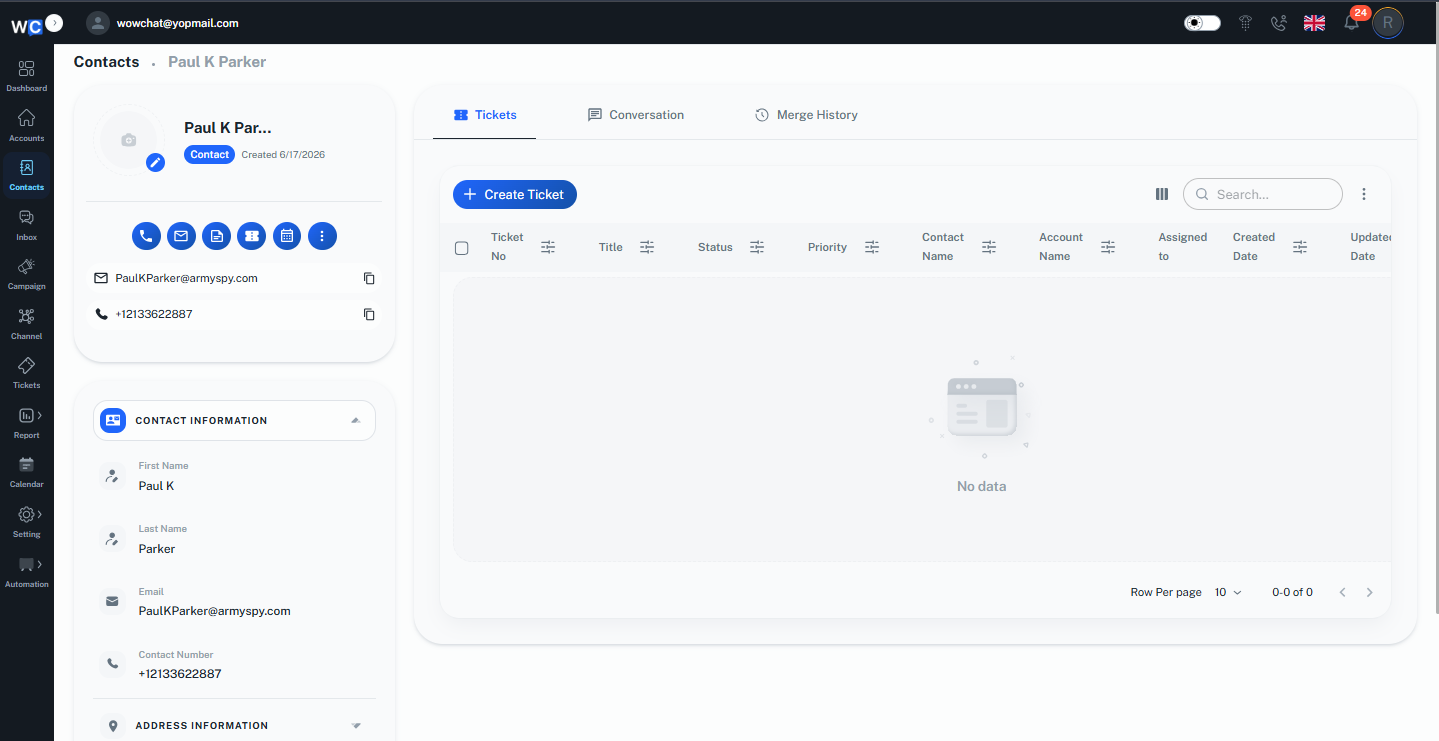
The Contact Information section displays the available details of the selected contact.Users can view important information such as:
- Contact name
- Email address
- Phone number
- Other available customer details
Users can also update contact information whenever required.
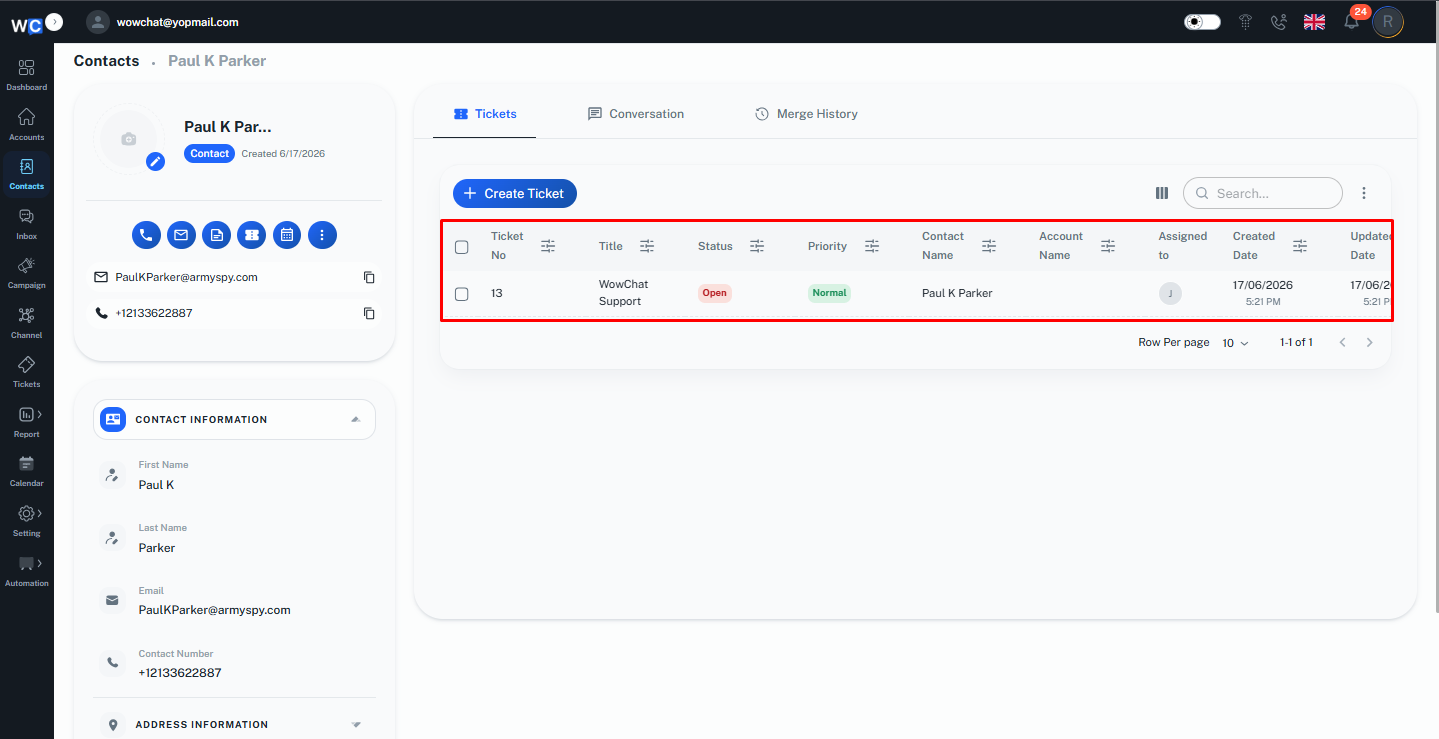
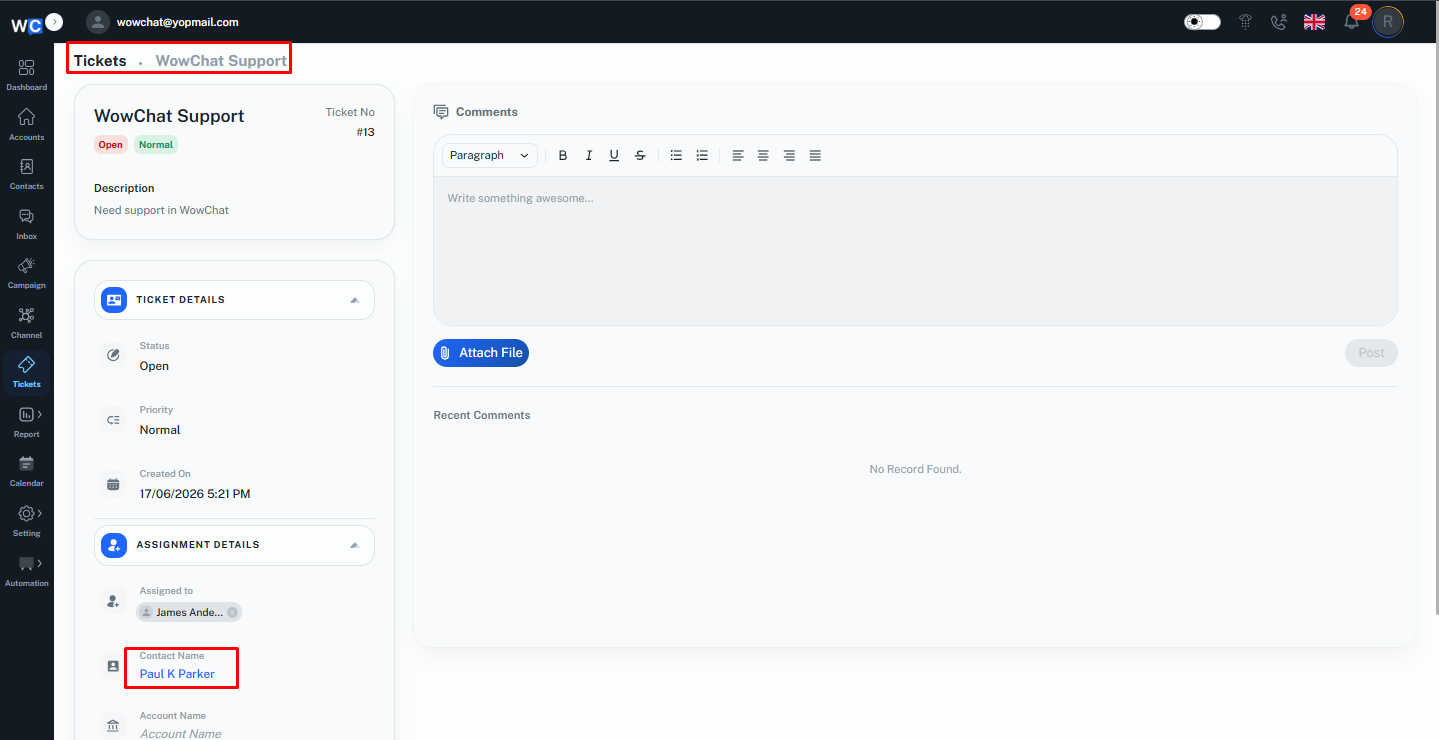
Ticket Management
Users can create a ticket directly from the Contact Details page and associate it with the selected contact.

While creating a ticket, the contact relationship is automatically linked, allowing users to track the customer request and manage it efficiently.Once the ticket is created, it will be displayed in the Related section of the contact record. The same contact relationship will also be visible in the ticket details under the related contact field.
Conversation history
All conversations with the contact from different communication channels are automatically recorded and displayed in the Conversation History section of the contact record.Users can review previous interactions, track customer communication, and access the complete conversation history from a single place.
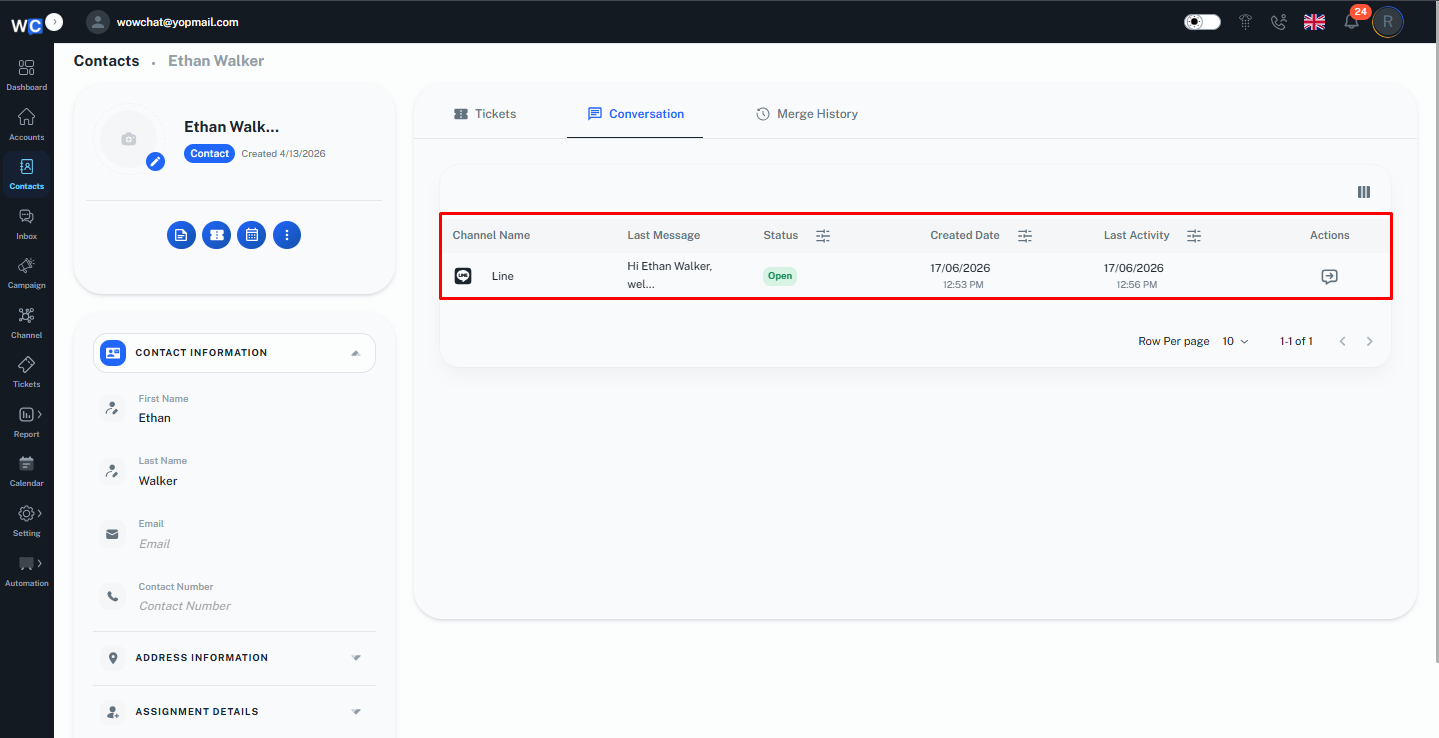
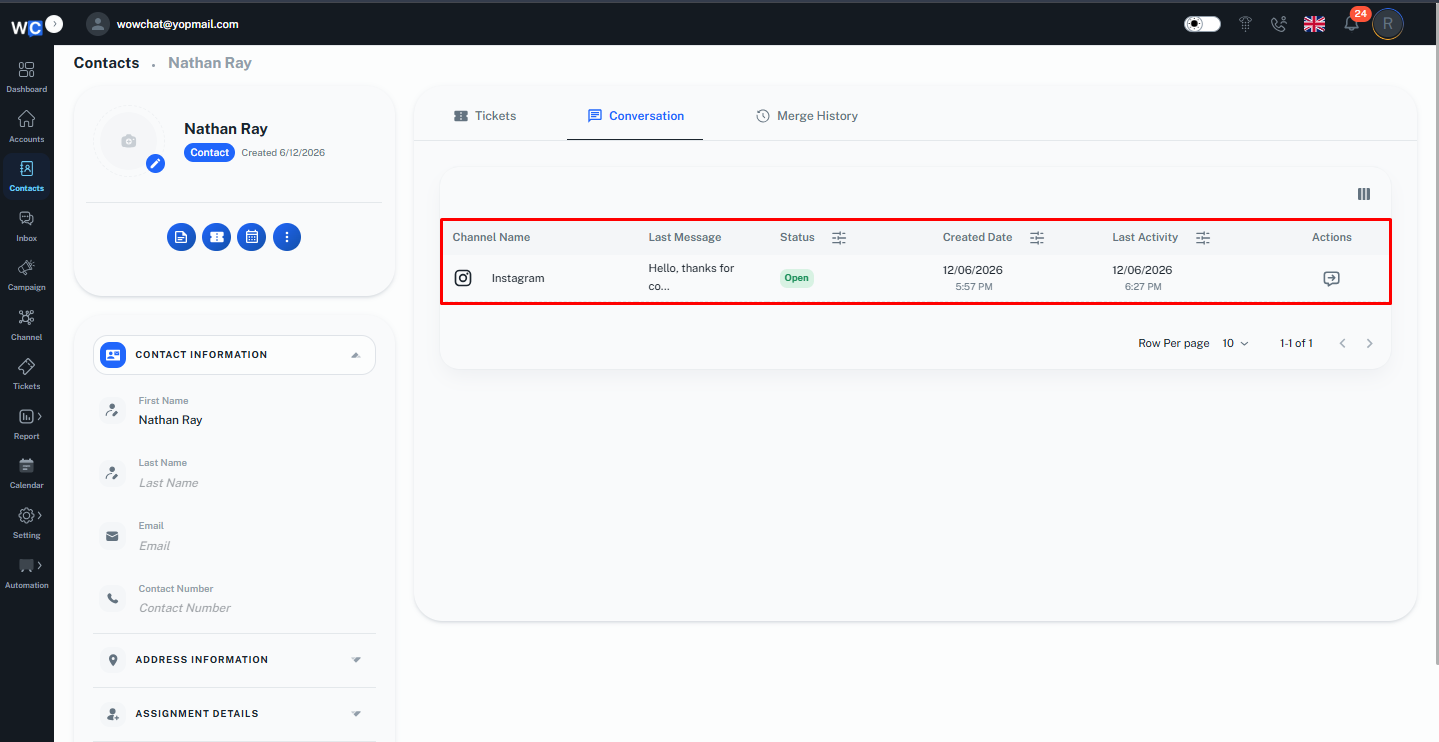
Users can click on the Action icon from the contact record to directly open the related conversation in the WowChat Inbox.The system will redirect the user to the chat window, where they can continue the conversation with the customer from the selected channel.
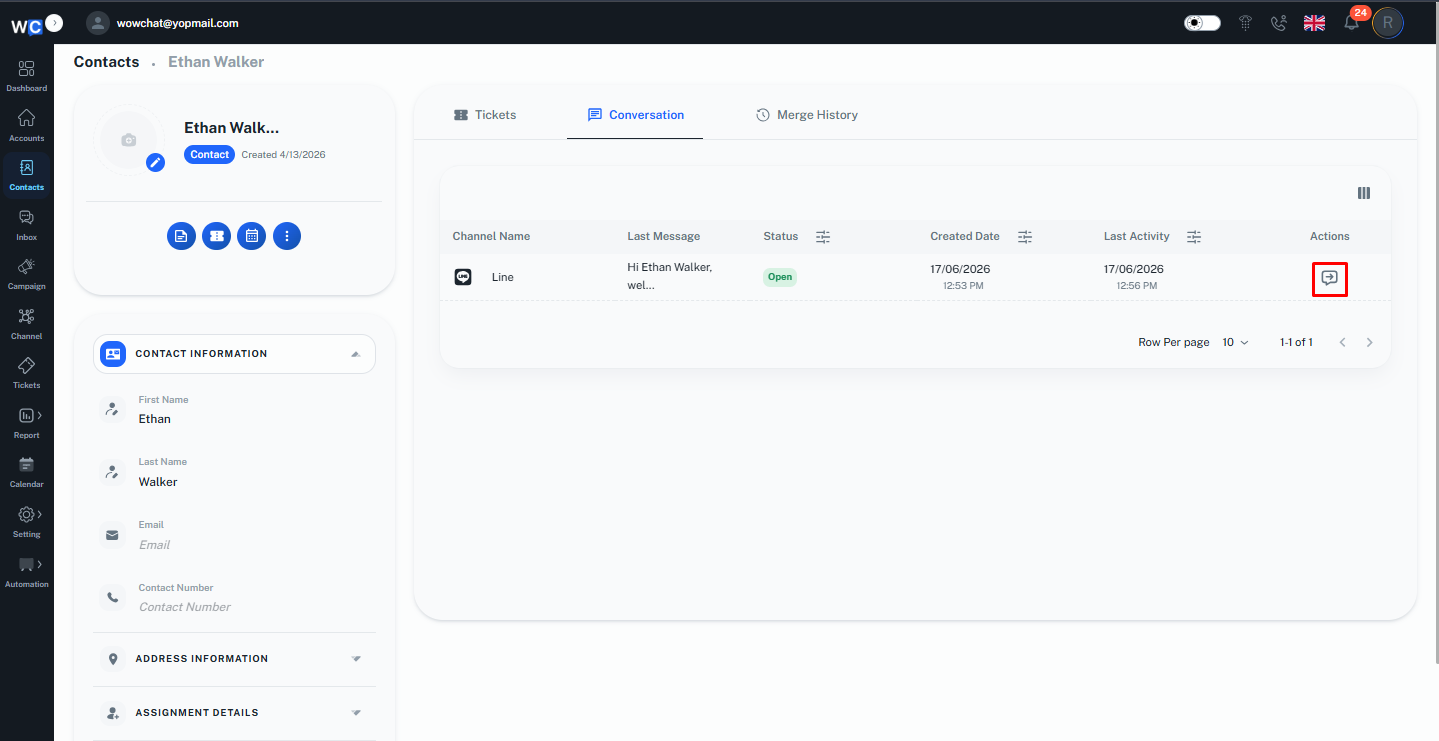
This helps teams maintain a complete view of customer interactions across all connected channels.
Merge Records
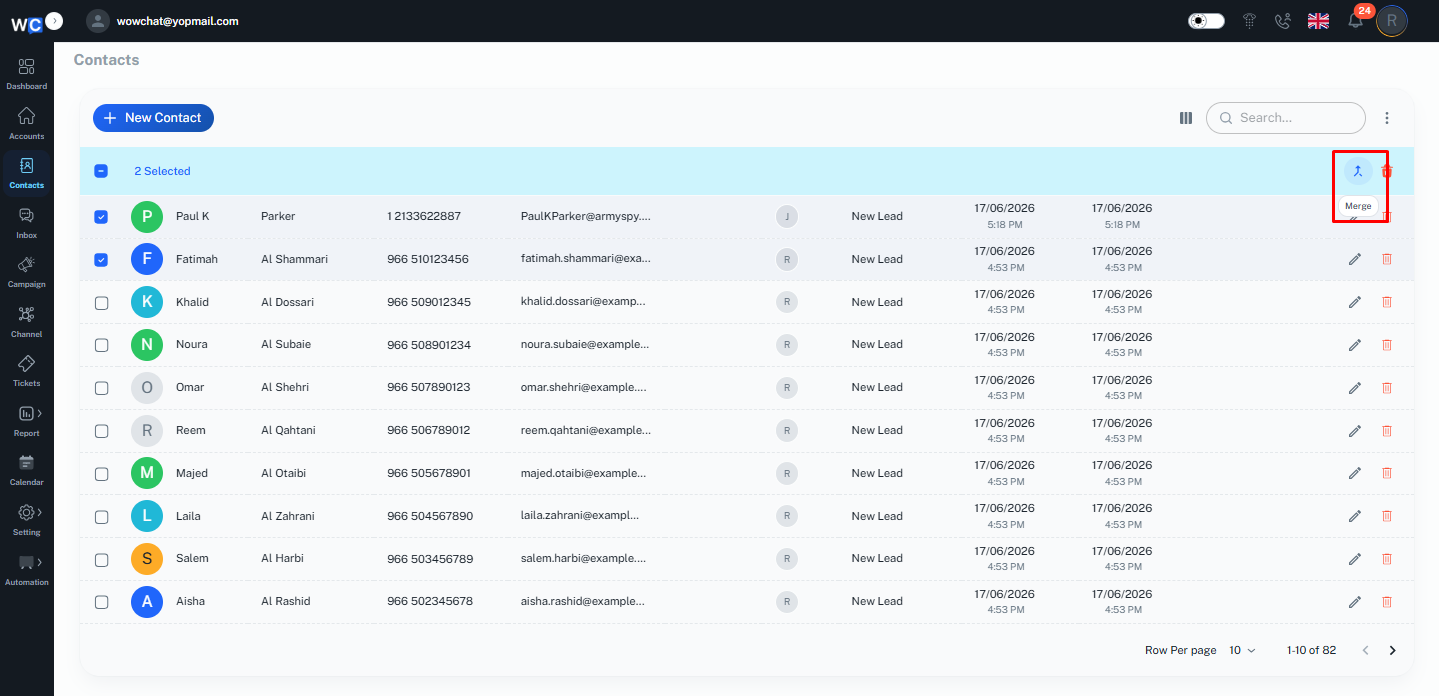
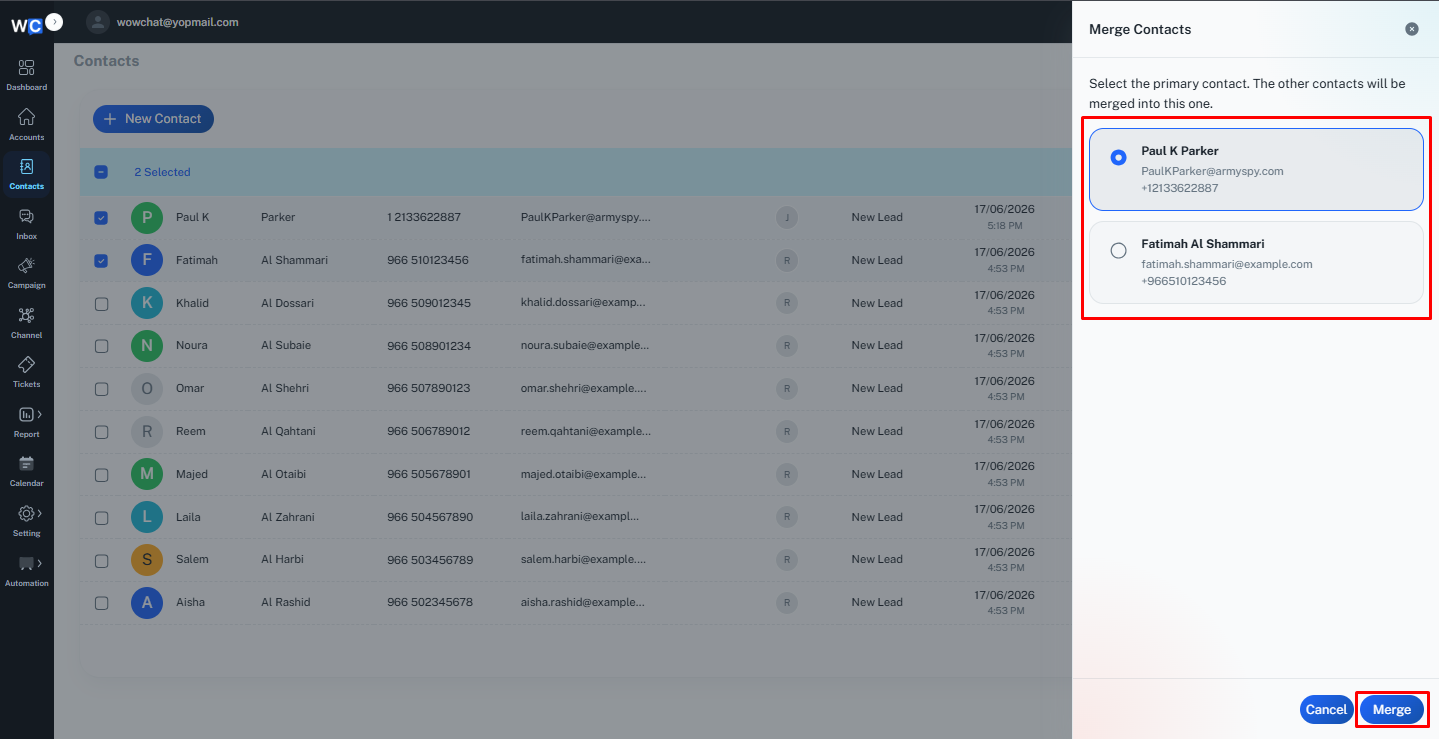
The Merge Records section allows users to combine duplicate contact records and maintain a history of merged records.When multiple records belong to the same customer, users can merge them into a single contact record to keep customer information organized and avoid duplicates.This section also displays the merge history, showing whether the contact record was previously merged with another record and providing details of the merge activity.To merge duplicate contact records, select the two contact records from the listing page and click on the Merge icon.Note: Users can merge a maximum of two contact records at a time.
A merge option will open where you can review and combine the selected records into a single contact record.
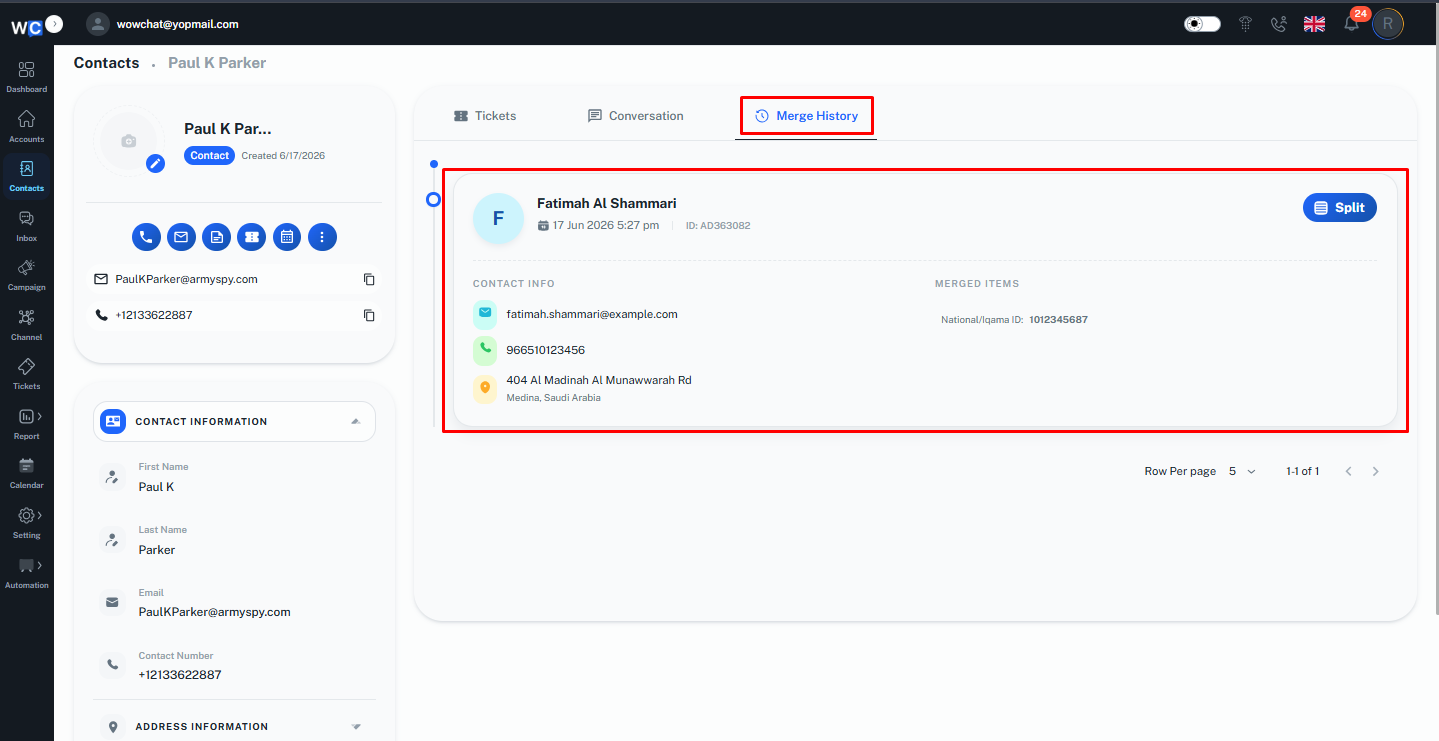
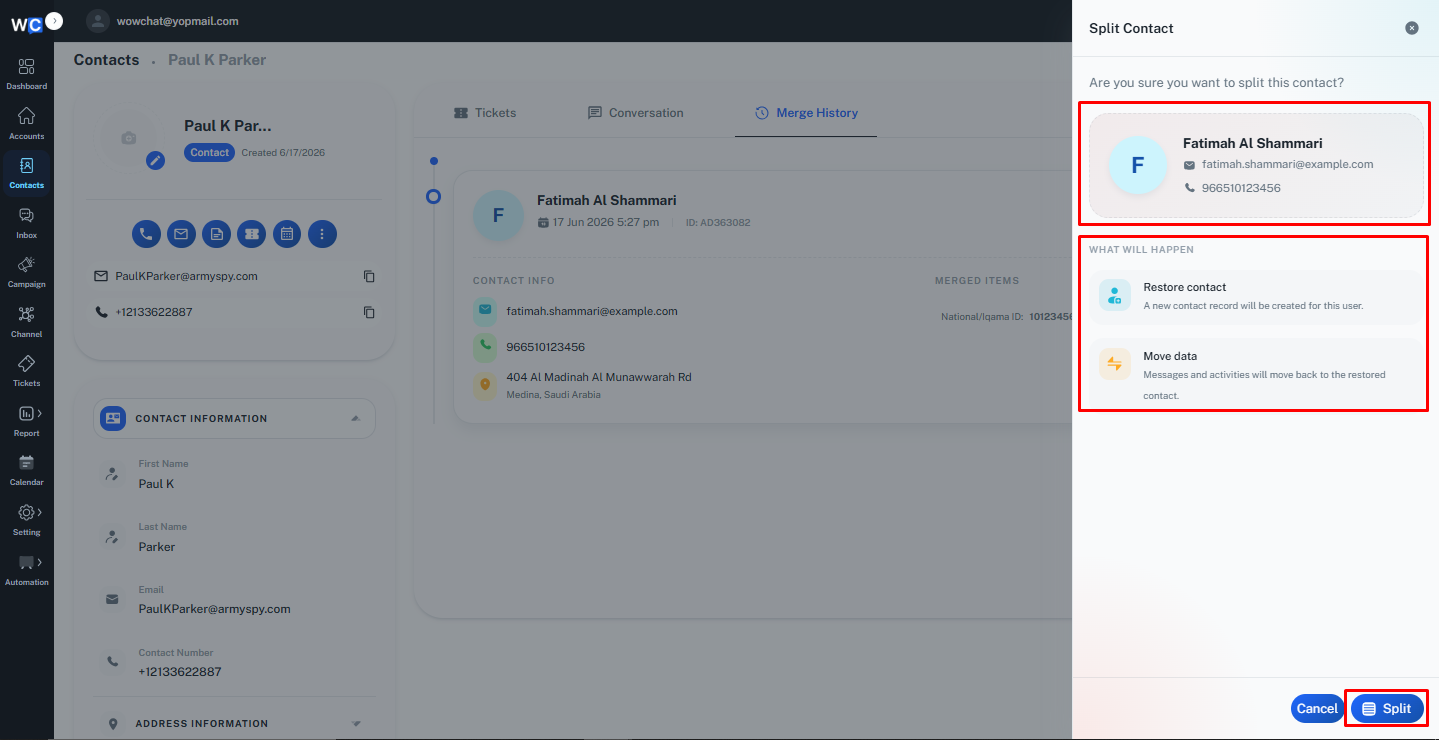
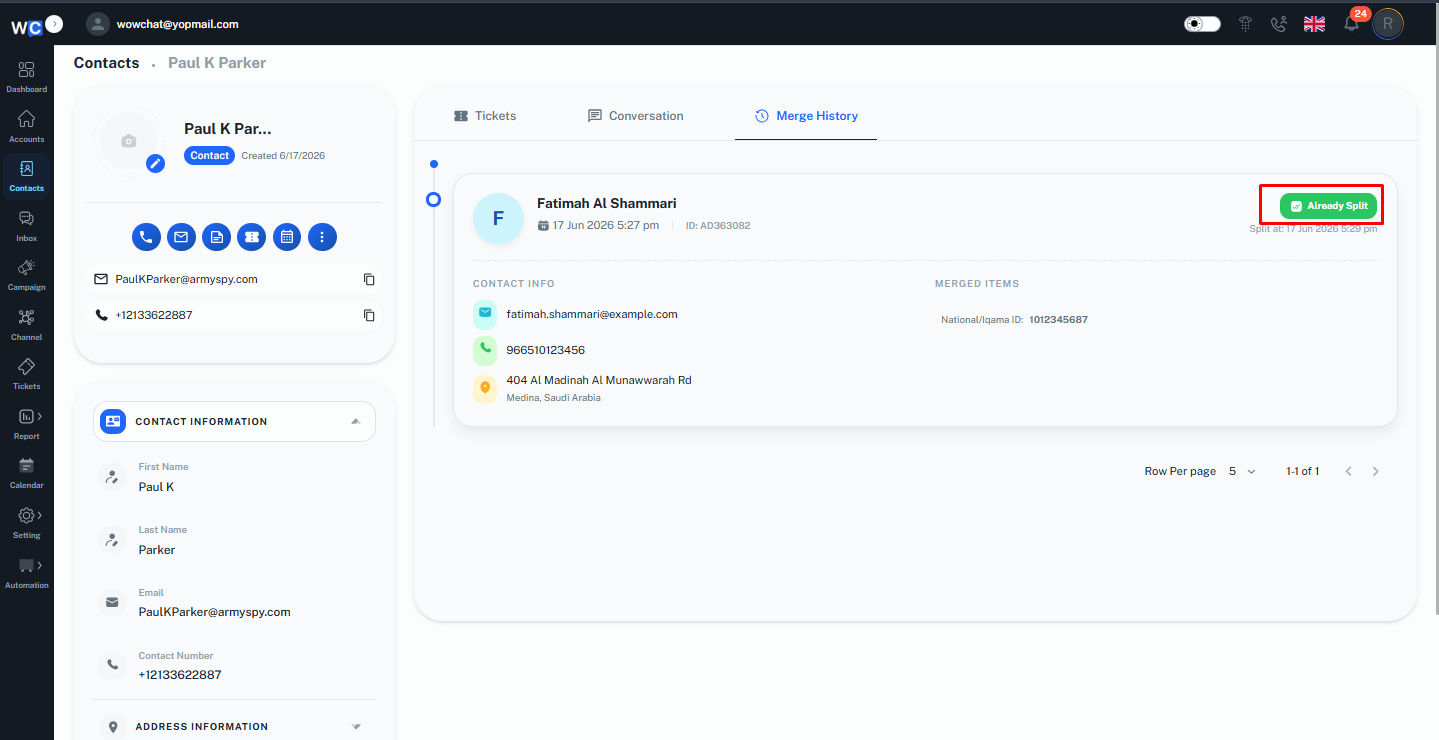
Merge History
After a contact record is merged successfully, users can view the merge activity from the Contact Details page.The Merge History section displays the details of previously merged records, allowing users to track merged contact records and review the merge history.
If you need to separate previously merged records, you can easily split them back into individual entries.To do this, navigate to the merged record and click on the Split Merged Record option. Once selected, the system will successfully split the merged entry and restore it as two separate records.
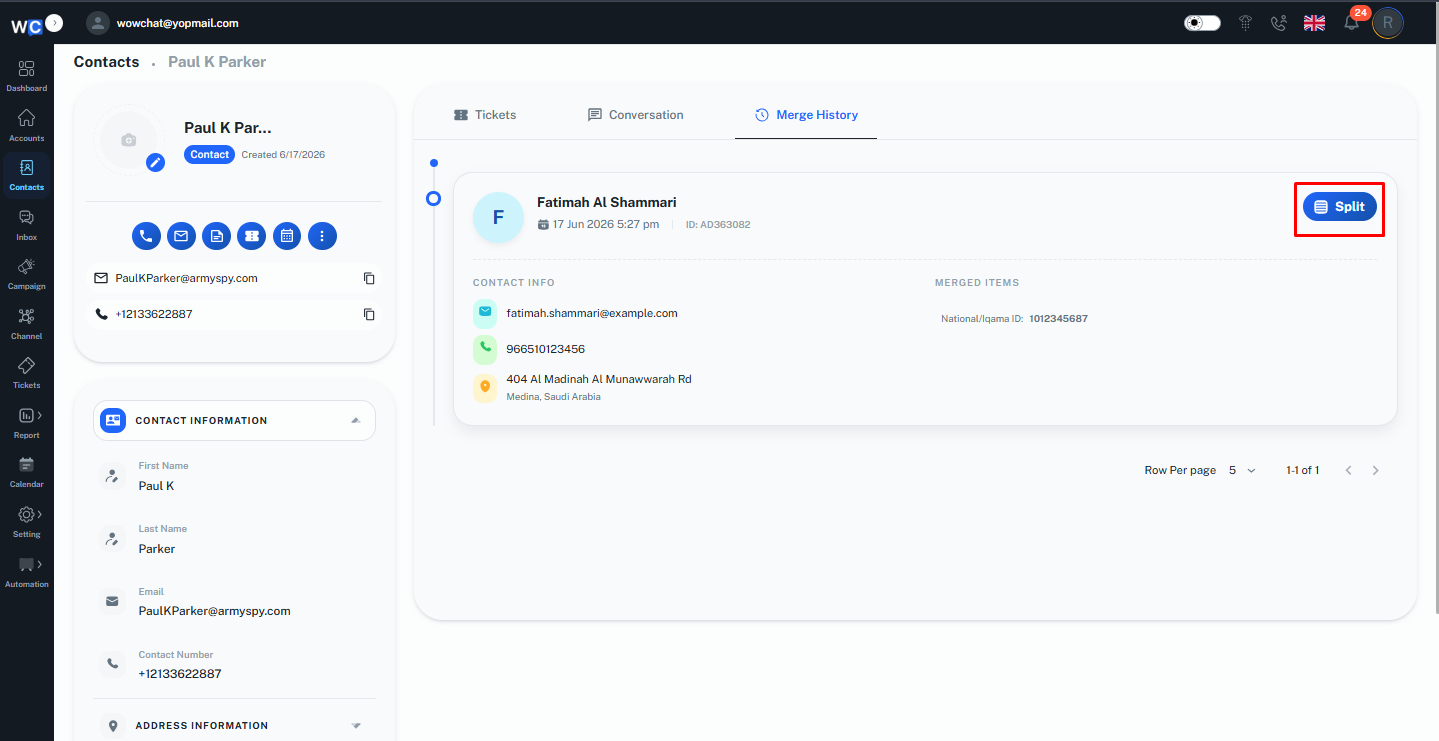
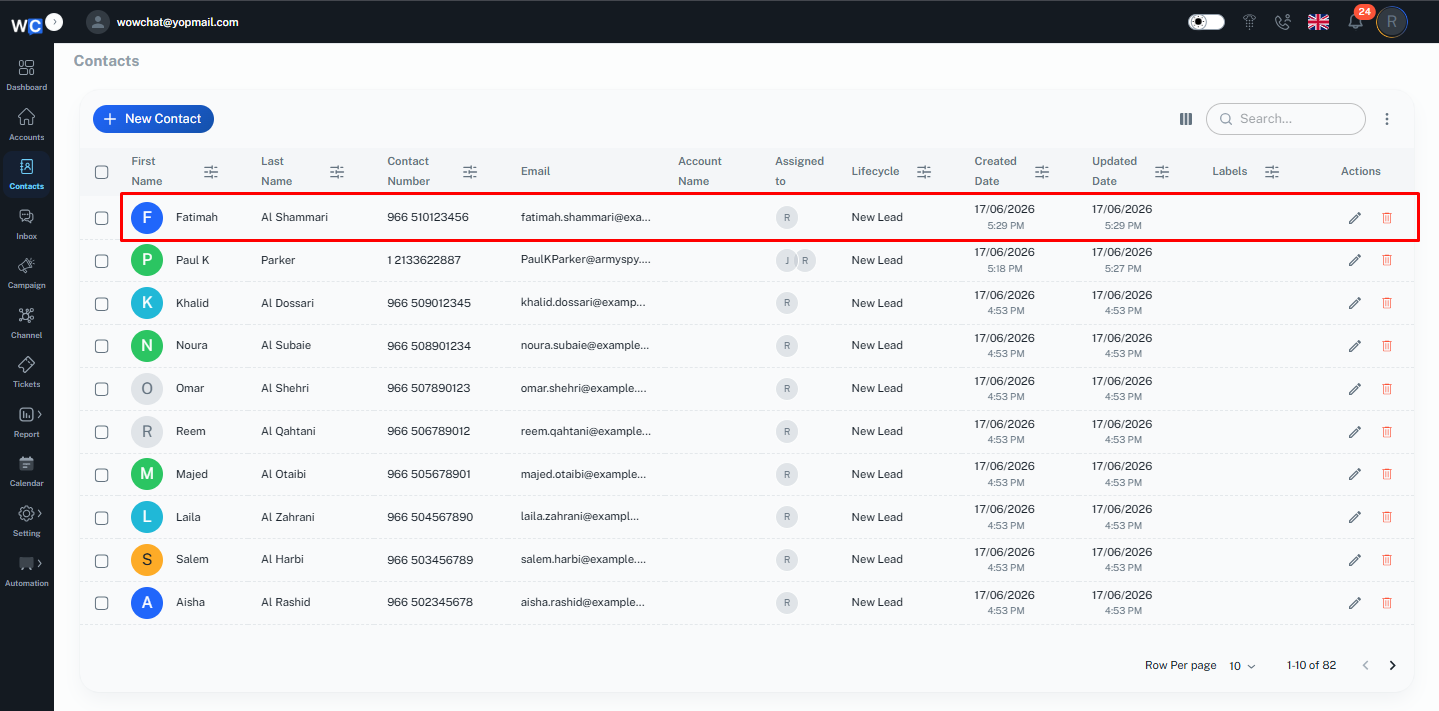
After the action is completed, both records will appear individually in the list with their original details intact.
Frequently Asked Questions (FAQ)
The Contact Details Page provides a complete view of a contact, including contact information, conversation history, tickets, merge records, and related activities in one place.